
This Python script notifies you when your favorite food is available

Why I badly needed this script + link to repo so you can copy it
Story time! 😃
There’s this restaurant I love, and they have an awesome dish: breaded cutlet stuffed with jalapenos.
Now, every story has an obstacle for the protagonist to overcome.
The obstacle in this story is that this delicious breaded cutlet with jalapenos is rarely available.
I also don’t love the idea of checking the restaurant’s website every day to see if it’s my lucky day. 🤯
This need led me to write a Python script that automatically checks if a certain food is available. If it is, I get an email with this subject line (listing the yummy foods within the email):

Or an email like this when there’s no food I’m interested in:

So if 1) you're a human with the basic survival need to eat, and 2) you know a restaurant that updates its menu daily on its website, this script will be super useful for you.
Without further ado, here’s the link to the GitHub repo.
Let’s see how the script works. 🙂
High-level overview of the script before we go into details
We’ll go through these steps:
Set up prerequisites for sending email (new Gmail address + Python function)
Scrape the webpage for yummy foods
Define secret variables in a
.envfile for automationAutomate scraping + email sending with GitHub Actions
If you want to run the script locally, don’t forget to install the required libraries:
pip install bs4 python-dotenv requests
Take care of your imports too:
from email.message import EmailMessage
import os
import re
import smtplib

from bs4 import BeautifulSoup
from dotenv import load_dotenv
import requests
Let’s get started!
1) Set up a Gmail address to send automated emails from
I don’t know about you*, but I bet you don’t want to use your regular Gmail address to send automated emails.
Me neither!
So let’s create a new Gmail account just for this purpose (with all the necessary settings and requirements for automation).
Go to gmail.com and create a new Gmail address.
Once you’ve signed in to your new Gmail account, go to your Google account.
Click on “Security” on the left:

On the security page, turn on “2-Step Verification”:

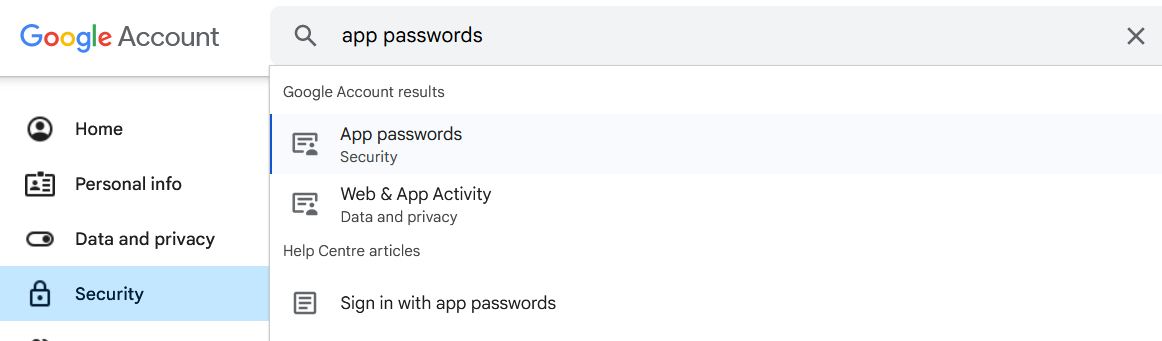
Type “app passwords” in the search bar and click on the “App passwords” option in the dropdown:
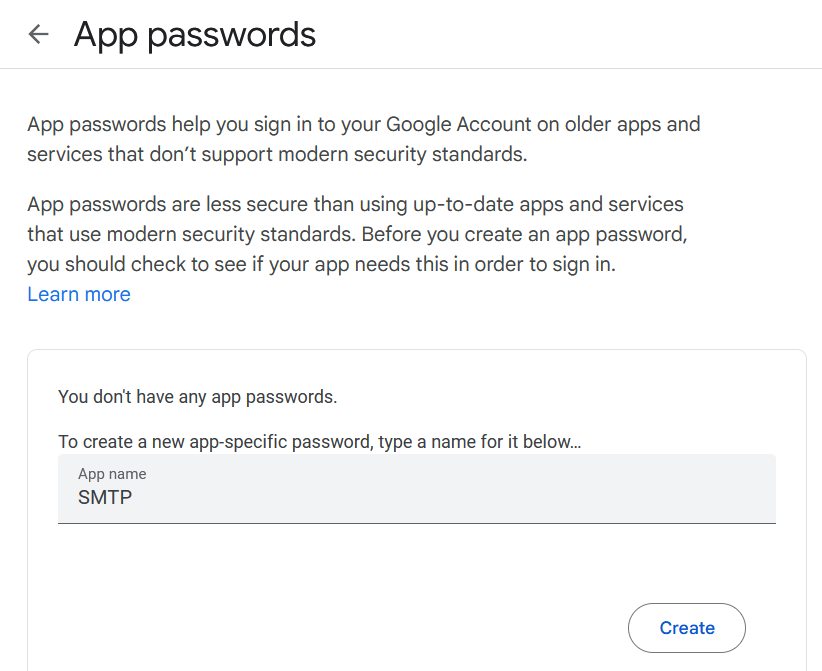
Name your new app password whatever you like (I used “SMTP” in the screenshot, you’ll see why in a bit), then click “Create”:
After clicking “Create,” a small window will pop up displaying your new app password, like this:
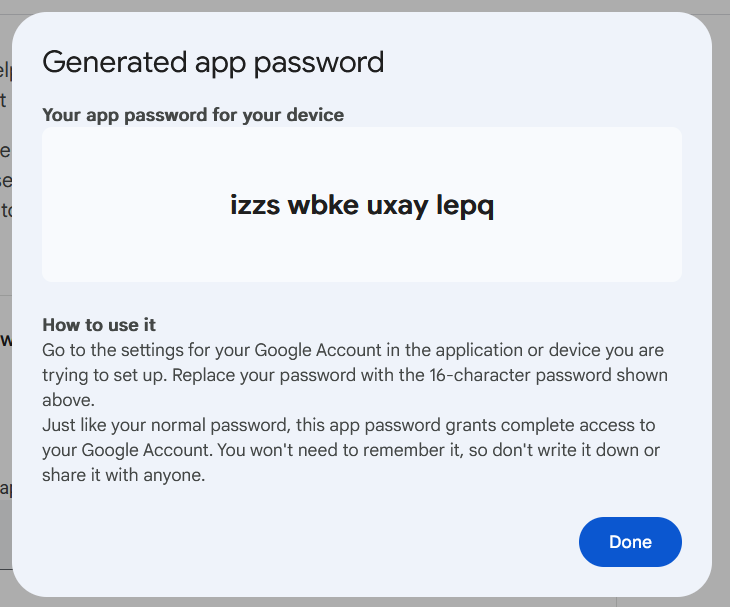
Don’t share your app password with anyone (I deleted the one in the screenshot to ensure it can’t be used).
You’ll need this app password in your script later, so save it somewhere safe where only you can access it.
Now you can start sending emails via Python! 🥳
How?
With the send_food_email() function:
def send_food_email(email_subject: str, email_body: str = "") -> None:
    """
    Create and send the automated email to a Gmail address.

    Args:
        email_subject (str): The subject of the email.
        email_body (str): The text content of the email.
    """

    # Create the email message
    msg = EmailMessage()
    msg["From"] = sender_email
    msg["To"] = recipient_email
    msg["Subject"] = email_subject
    msg.set_content(email_body)

    # Try to send the email using Gmail's SMTP server
    try:
        with smtplib.SMTP("smtp.gmail.com", 587) as server:
            server.starttls() # Start TLS encryption
            server.login(sender_email, sender_email_app_password) # Login to the SMTP server
            server.send_message(msg) # Send the email
        print("Email sent successfully.")
    except smtplib.SMTPException as e:
        print(f"Failed to send email: {str(e)}")
It’s a really simple function consisting of two parts:
The first part creates the email message:
# Create the email message
    msg = EmailMessage()
    msg["From"] = sender_email
    msg["To"] = recipient_email
    msg["Subject"] = email_subject
    msg.set_content(email_body)
(Just replace the variable values above with strings and you can try out email sending via Python.)
The second part sends the email using the Gmail address you’ve just created:
# Try to send the email using Gmail's SMTP server
    try:
        with smtplib.SMTP("smtp.gmail.com", 587) as server:
            server.starttls() # Start TLS encryption
            server.login(sender_email, sender_email_app_password) # Login to the SMTP server
            server.send_message(msg) # Send the email
        print("Email sent successfully.")
    except smtplib.SMTPException as e:
        print(f"Failed to send email: {str(e)}")
Now that we can send emails, let’s find some yummy foods worth sending emails about! 😁
2) Scrape the restaurant’s webpage to see what foods are available
In this article I won’t teach you about web scraping (I have a tutorial series on web scraping if you’re interested).
What I’ll show you in this section is how the code’s scraping part works. While the basic variables and the logical structure of the code will be the same for you, be prepared to do some extra work when setting up scraping for your specific use case.
Back to the scraping magic! 🧙♂️
2.1) Define your yummy foods + a variable to make your scraping code more human-like
First, we set up two variables:
by defining
user_agent, our code will look more like a normal human wanting to check the menu and hopefully won’t get blocked by the website (blocking may still happen though, but that’s another story for another time),in
yummy_food_regex, we list the foods or types of foods we’d like to get notified about in a regex format.
# Variables for scraping
user_agent = "Mozilla/5.0 (Windows NT 10.0; Win64; x64) AppleWebKit/537.36 (KHTML, like Gecko) Chrome/90.0.4430.93 Safari/537.36"
yummy_food_regex = re.compile(r"jalapeno|chili", re.IGNORECASE)
2.2) Scrape the page to gather the available foods
We load the webpage referenced in url:
headers = {"User-Agent": user_agent}
response = requests.get(url, headers=headers)
(Don’t worry about where url gets its value, it’ll be defined in the “4) Automate the script with GitHub Actions so it’s comfy for you” section.)
We initiate an empty list to store the yummy foods and create a soup object holding the loaded webpage’s content:
# Create a list for storing foods we're interested in
yummy_foods = []
# Create a soup object from the scraped page
soup = BeautifulSoup(response.text, "html.parser")
After that, we check the loaded webpage’s content for foods, and if we find any yummy foods, we’ll add them to yummy_foods:
# Get all foods from the scraped page
em_tags = soup.find_all("em")
for em_tag in em_tags:
    content = em_tag.decode_contents()
    foods_on_menu = content.split("<br/>")
    foods_on_menu = [BeautifulSoup(food_on_menu, "html.parser").get_text(strip=True) for food_on_menu in foods_on_menu]

# Add matching food items to the "yummy_foods" list
for food_on_menu in foods_on_menu:
    if re.search(yummy_food_regex, food_on_menu):
        yummy_foods.append(food_on_menu)
Finally, if we have at least one yummy food, we’ll send an automated email with the great news using the send_food_email() function:
# Send an email with yummy foods listed if yummy foods are found
if yummy_foods:
    yummy_foods_in_email = "\n".join(yummy_foods)
    send_food_email("Yummy food's available! ^^", yummy_foods_in_email)
If there's no yummy food available, we'll still get notified, but with a different message:
# Otherwise send a different email if yummy foods are not available
else:
    send_food_email(email_subject="No yummy food today. :(")
2.3) Put everything into a function
As a final touch, let's put all this code into one function and add a try-except block to make sure we receive emails even if the scraping fails for some reason:
def check_url_for_yummy_food(url: str) -> None:
    """
    Scrape the url for foods from the "yummy_food_regex" variable.
    Then send an email about the result by calling "send_food_email()".

    Args:
        url (str): The url to scrape.
    """

    # Try to check the URL for yummy foods
    try:
        headers = {"User-Agent": user_agent}
        response = requests.get(url, headers=headers)
        if response.status_code == 200:
            # Create a list for storing foods we're interested in
            yummy_foods = []
            # Create a soup object from the scraped page
            soup = BeautifulSoup(response.text, "html.parser")

            # Get all foods from the scraped page
            em_tags = soup.find_all("em")
            for em_tag in em_tags:
                content = em_tag.decode_contents()
                foods_on_menu = content.split("<br/>")
                foods_on_menu = [BeautifulSoup(food_on_menu, "html.parser").get_text(strip=True) for food_on_menu in foods_on_menu]

                # Add matching food items to the "foods_on_menu" list
                for food_on_menu in foods_on_menu:
                    if re.search(yummy_food_regex, food_on_menu):
                        yummy_foods.append(food_on_menu)

            # Send an email with yummy foods listed if yummy foods are found
            if yummy_foods:
                yummy_foods_in_email = "\n".join(yummy_foods)
                send_food_email("Yummy food's available! ^^", yummy_foods_in_email)
            # Otherwise send a different email if yummy foods are not available
            else:
                send_food_email(email_subject="No yummy food today. :(")

        # Send an email if the request was not successful
        else:
            send_food_email(email_subject=f"Failed to retrieve the page. Status code: {response.status_code}")

    # Send an email if there was a request exception
    except requests.RequestException as e:
        send_food_email(email_subject=f"An error occurred: {str(e)}")
This will be the main function we call at the end of the script:

But before we automate it, we need to talk about secrets. 🫢
3) Set up a .env file to keep your secrets to yourself
Okay.
This step is only needed if you plan to run your script locally.
I do recommend you go through this section nonetheless for two reasons:
Sooner or later, you'll have to use .env in your work or personal projects, so it's a good idea to familiarize yourself with the main concepts.,
you'll also understand better what's happening when you automate your script with GitHub Actions..
he main idea behind .env is that you don't want to expose sensitive information in your code, like passwords or API keys.
You can store your secrets in a file called .env:
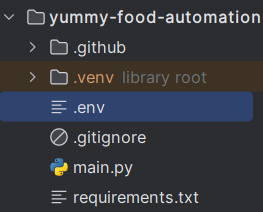
The .env file contains the variables you want to keep secret along with their values, making them available only to you:
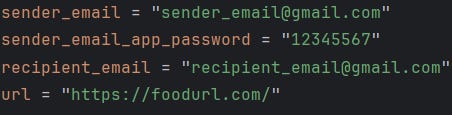
(If you want to run this script locally, create a .env file on your machine and provide the variables shown above.)
Our script can access these variables using a simple method:
# Load environment variables from .env file
load_dotenv()
Then, using the os module, we can assign the loaded environment variables to our Python variables:
# Retrieve environment variables
sender_email = os.environ["sender_email"]
sender_email_app_password = os.environ["sender_email_app_password"]
recipient_email = os.environ["recipient_email"]
url = os.environ["url"]
Now, we can use these loaded variables in the send_food_email() function here:
msg["From"] = sender_email
msg["To"] = recipient_email
msg["Subject"] = email_subject
And here:
server.login(sender_email, sender_email_app_password)Nice.
At this point, both the email sending and scraping functions are working. We just need to automate the script, and we're done! 😎
4) Automate the script with GitHub Actions to make it easy for you
GitHub Actions is a cool feature that lets you automate your scripts without setting up a remote server. All you need is a GitHub account and a few settings
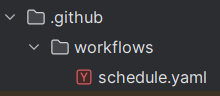
A new folder called
.github, and another folder inside it calledworkflows.A
yamlfile inside.github/workflows. You can name it anything you want; I named mineschedule.yaml.
Here’s what it will look like:
Great.
Let’s create the content of the yaml file:
name: check-food-on-weekdays

on:
  schedule:
    - cron: "0 7 * * 1-5"

jobs:

  build:
    runs-on: ubuntu-latest
    steps:
      - name: Checkout
        uses: actions/checkout@v4

      - name: Set up Python
        uses: actions/setup-python@v4
        with:
          python-version: "3.10"

      - name: Install Python packages
        run: |
          python -m pip install --upgrade pip
          pip install -r requirements.txt

      - name: Run the script
        env:
          sender_email: ${{ secrets.SENDER_EMAIL }}
          sender_email_app_password: ${{ secrets.SENDER_EMAIL_APP_PASSWORD }}
          recipient_email: ${{ secrets.RECIPIENT_EMAIL }}
          url: ${{ secrets.URL }}
        run: python main.py
Let me break it down.
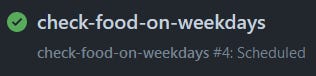
First, we give a name to our automated job – you can call it whatever you want:
name: check-food-on-weekdaysThe name you provide here will be used in your GitHub account so you can check whether the automation ran or not:
Next, we define when the job should run (mine runs at 7 AM on weekdays):
on:
  schedule:
    - cron: "0 7 * * 1-5"
Then, we create the automation and define the steps it should take. The first step checks out our GitHub repository:
jobs:

  build:
    runs-on: ubuntu-latest
    steps:
      - name: Checkout
        uses: actions/checkout@v4
We set up Python with version 3.10 (you can use another version):
- name: Set up Python
  uses: actions/setup-python@v4
  with:
    python-version: "3.10"
We install the packages listed in the requirements.txt file:
- name: Install Python packages
  run: |
    python -m pip install --upgrade pip
    pip install -r requirements.txt
Finally, we load the environment variables used by our script and run the script:
- name: Run the script
  env:
    sender_email: ${{ secrets.SENDER_EMAIL }}
    sender_email_app_password: ${{ secrets.SENDER_EMAIL_APP_PASSWORD }}
    recipient_email: ${{ secrets.RECIPIENT_EMAIL }}
    url: ${{ secrets.URL }}
  run: python main.py
Hold up a minute! 🤨
What’s this “secrets” (as in secrets.SENDER_EMAIL) stuff, and how does GitHub Actions know about our environment variables?
A great question, indeed. Luckily, we already discussed .env files, right? 😉
GitHub secrets are like the secret environment variables defined in a .env file – they’re just called “secrets” in the context of GitHub and are set up in a different place.
Let me show you how.
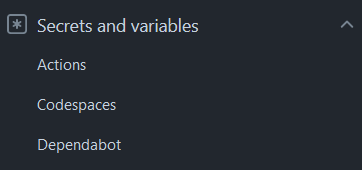
In your repository, click “Settings”:

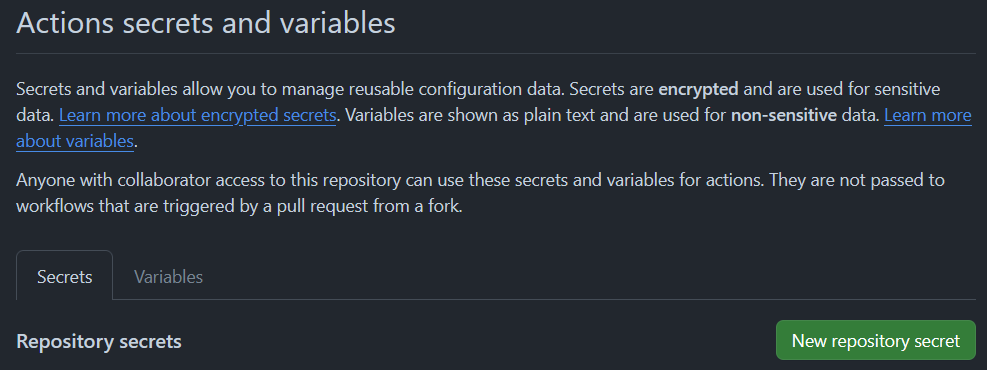
Under “Security” on the left, choose “Secrets and variables”, then “Actions”:
Then click on the green button (“New repository secret“):
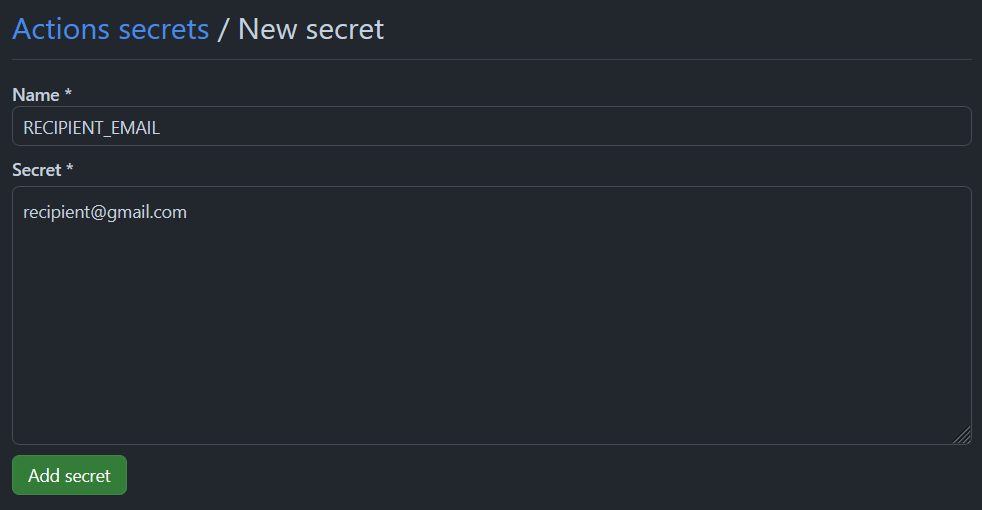
Give your secret a name, add its value, and save it:
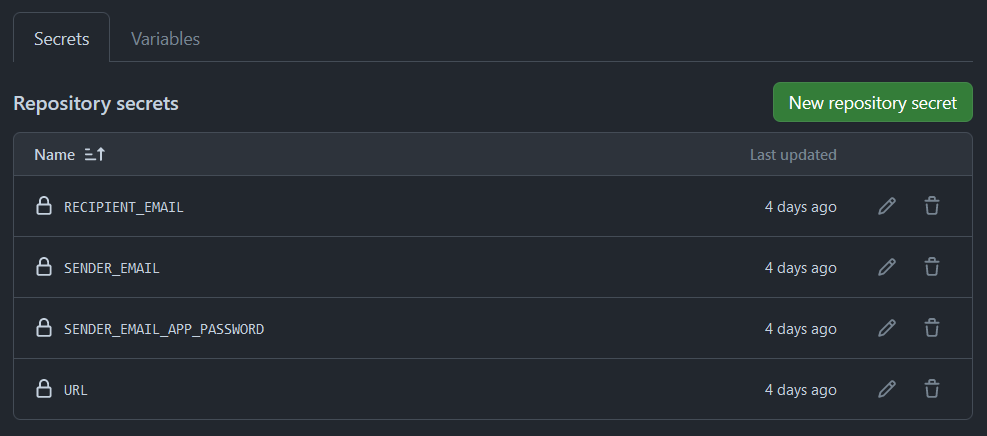
Repeat this step for all four environment variables used in the script. Once you’re done, you should see this:
Now you’re all set up and you just have to wait for the automation to run! 🎉
That’s it
I hope this script helps you hunt down yummy foods just as much it helps me.
Let me know if you get to eat one of your favorite foods thanks to this automation!
And have an awesome day! ✌️
*I don’t know you, but we can connect on LinkedIn. 😉
Cool project!